
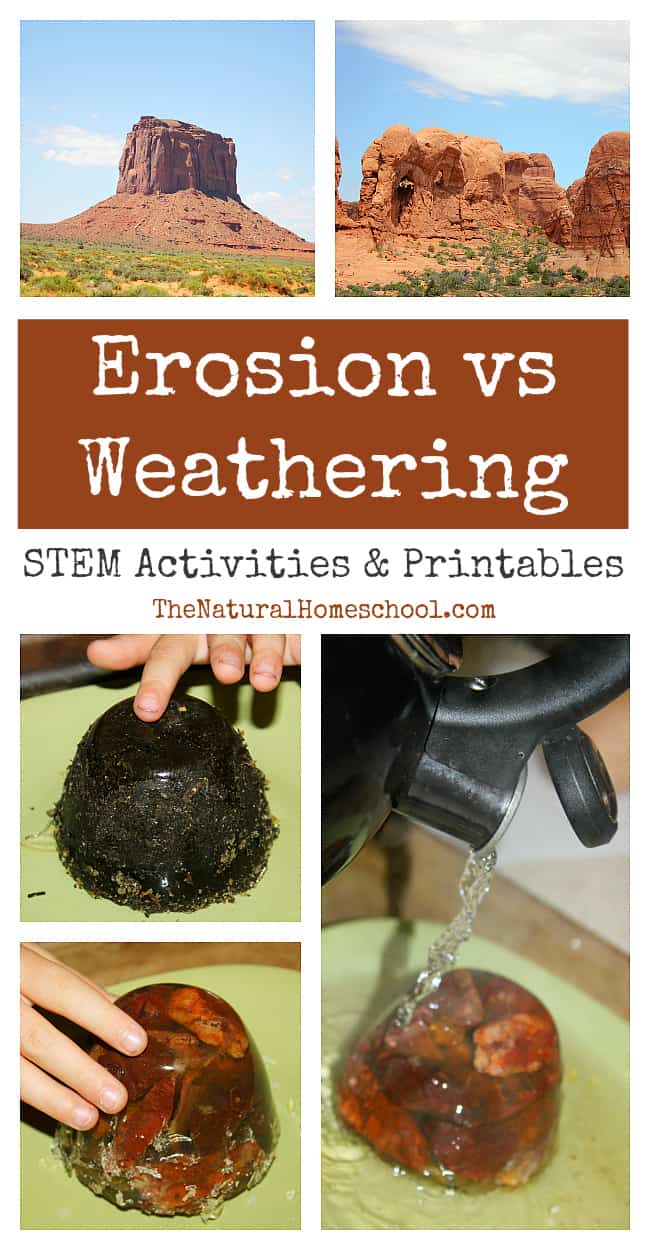
It is important for students to know the difference between erosion and weathering when they are studying Earth Science. To do this, we read some books on both concepts and I made some weathering and printables after our Summer trip (where we discussed erosion and weathering at length).
But now, we will show you one of the Science STEM activities we did to reiterate our learning. We also studied about some of the natural wonders of the world to expound our research on the topic. So what is the difference between weathering and erosion? Find out here!
I just loved that we used our knowledge on erosion and weathering to come up with a Science experiment. Of course, we read some books, researched online and used the Scientific Method to conduct our experiment.


Erosion vs Weathering Science STEM Activities
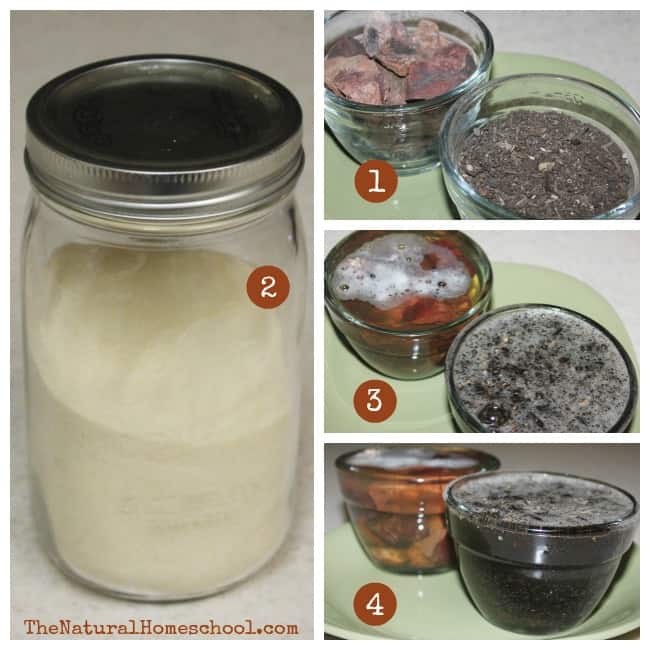
Let’s prep for this awesome STEM experiment! You will need: beef gelatin or regular, colorless gelatin, 2 bowls (that hold about 1 cup of liquid and that if turned upside down, they resemble a small mountain, enough rocks to cover one of the bowls and enough dirt or sand to cover 3/4 of the other bowl.
If you do buy the beef gelatin (which is what I used), you can store it in an airtight jar instead of in the original container. Alright, now that you have everything, you take 2 cups of water and bring to a slight boil. Turn the heat off and add 1/2 cup of gelatin. Use a whisk to mix it in really well. Let it rest and cool a bit.
Meanwhile, in one bowl, place rocks until they go to the top, but don’t go part the brim. In the other bowl, put enough dirt, soil or sand to cover about 3/4 of the bowl. Slowly, pour the gelatin into each bowl until the bowls are completely filled. Don’t mess with the bowl with rocks in it. Use a knife to gently mis the gelatin into the soil (sand) until mixed well. Place in refrigerator and let it solidify for a few hours or overnight.
There are many easy experiments using scientific method and this is definitely one of them. What are the steps of the scientific method? You can use the technology part of the STEM (Science, Technology, Engineering and Math) acronym to do your research or you can go print this Science experiment printable! It will make your life so much easier. So, grab the printable or make your own list of the steps in the Scientific Method and then write down “The Difference between weathering and erosion” as the title on your sheet.
Once the “mountains” are solid, it is time to use a knife to go around the inside of the bowls to loosen them. Flip the bowls over and set them on a plate. Then place the plate on a cookie sheet or a tray with an edge. The sand/soil mountain will be our erosion model and the rock mountain will represent our weathering model. Explain to kids how water, ice, the elements like wind and such change the surface of mountains and land overtime.

Erosion is Different from Weathering
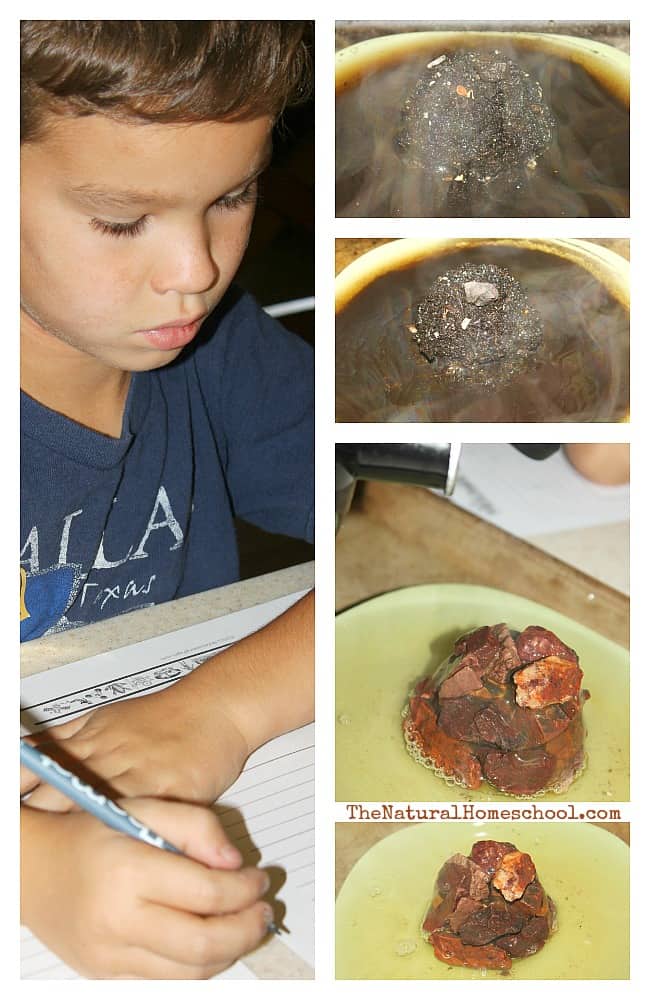
For this, it is best to work in the kitchen. Boil some water on the stove. Meanwhile, in their sheets, they write down their hypothesis on how erosion differs from weathering and what they think will happen when we pour hot water over each.
Once their hypothesis is written, they will draw what each mountain looks like now. Let them feel them and touch them to analyze them well. They can clearly see that they’re solid, they have a definite shape and they look different. We sue the Math part of STEM to measure the height of each mountain (both measure the same).
Now, the adult slowly pours hot water on the erosion mountain as the kids observe what is happening. We use the Math in STEM to count 10 seconds (to be even and fair to both mountains). The erosion mountain began disintegrating and falling apart. We noted that on our notebooking pages.
Then we did the same to the weathering mountain. The gelatin (which represents the softer elements in the composition of a mountain) disintegrated, but the rocks stayed stacked up. There were new gaps between the rocks, but the height stayed the same. We recorded that in our notes.
Weathering and Erosion Printables
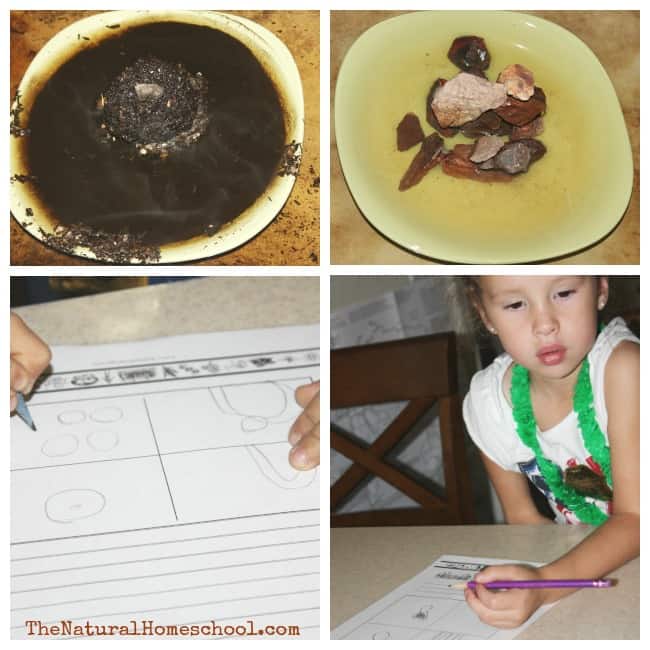
Continuing with the experiment of erosion vs weathering, we decided to pour hot water over each a second time for 10 second each. Look at the pictures below. The mountains fell apart even more. We noted that in our Science experiment sheets. Then we drew what our mountains look like now.
Let me tell you that our printables in What is the Difference between Weathering and Erosion? {Free Printables} were super helpful and I high;y recommend you get those, too. If you are interested in getting more Science notebooking pages and notebooking pages on any and every subject and topic you can think of, then GO HERE!


Thank you for visiting our Erosion vs Weathering post! You might also like:
Top 20 Free Printables List for Preschool and Kindergarten
50+ Science Experiment Kits for Kids
Edible Science Experiments for Kids {Printables}
Kid Science Lab Kits: Extreme Weather
Animals in Winter: Migration, Hibernation & Adaptation {Free Printable}
<<<— Try some free samples of the notebooking pages so you can see just how great they are!
Original article and pictures take http://www.thenaturalhomeschool.com/erosion-vs-weathering-awesome-science-stem-activities.html site
Комментариев нет:
Отправить комментарий