
-5 - 1"x6"x8' (we used cedar)
-2 - 1"x2"x8'
-1 - 4"x4"x8'
-Kreg Blue-Kote Pocket Screws - 1-1/4-Inch
-2" outdoor wood screws
-1 1/4" outdoor wood screws
-Kreg Mini Kreg Jig Kit
-Titebond-3 Ultimate Wood Glue
-3/4" x 6" Standard Length Spade Bit
-Dap Clear Silicone Sealant
-Landscape Fabric
-Outdoor stain/sealer
*contains affiliate links
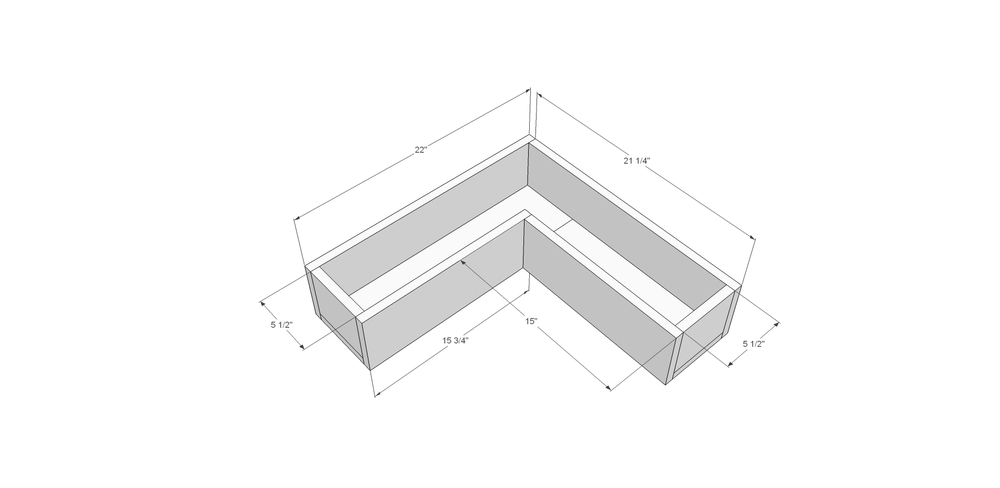
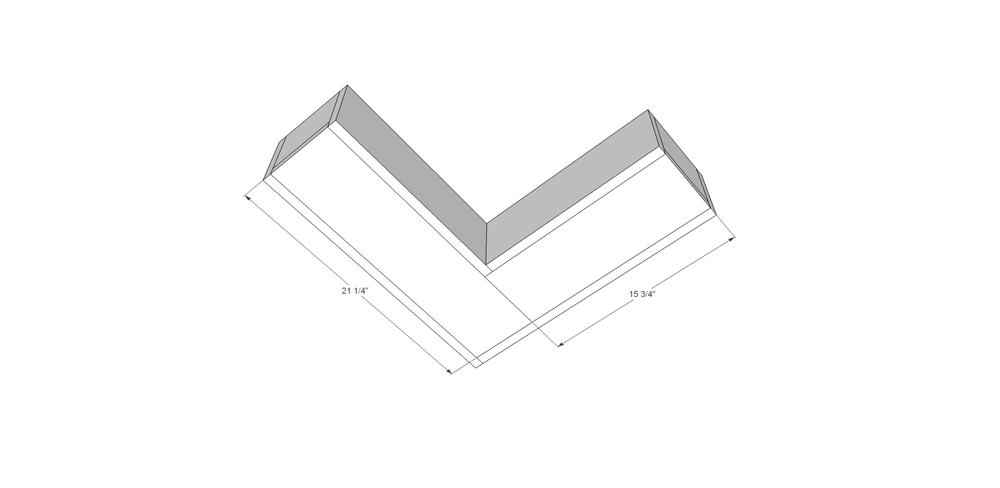
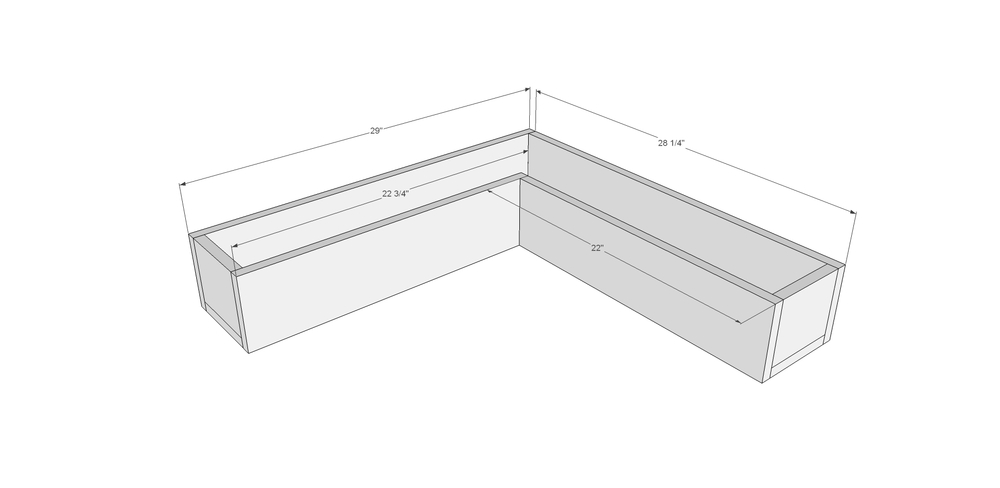
Cut List
- 1"x6"
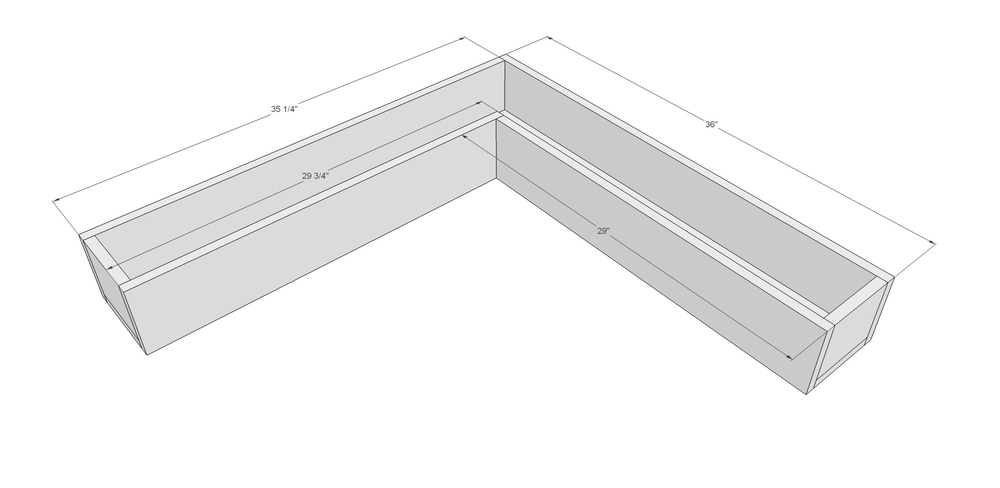
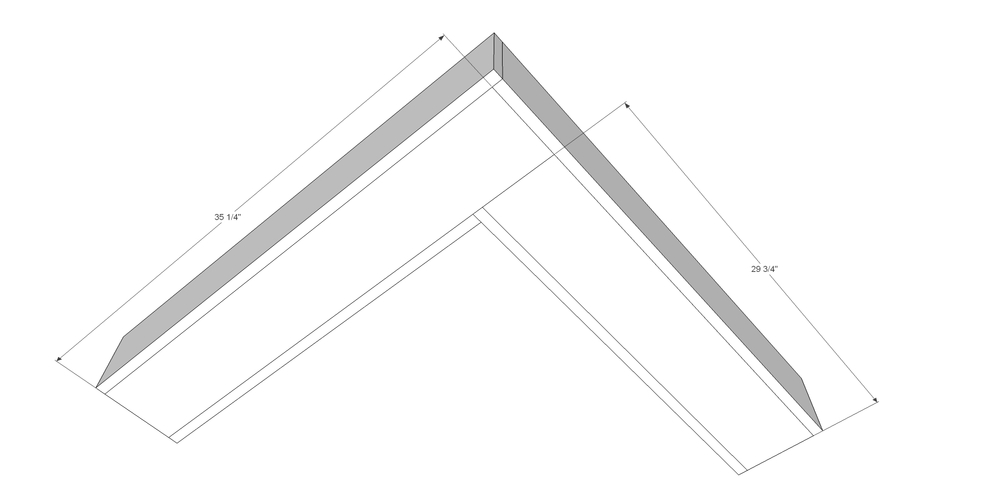
- 36" - Top Back
- 35.25" - Top Back
- 29.75" - Top Front
- 29" - Top Front
- 35.25" - Top Bottom
- 29.75 - Top Bottom
- 29" - Middle Back
- 28.25" - Middle Back
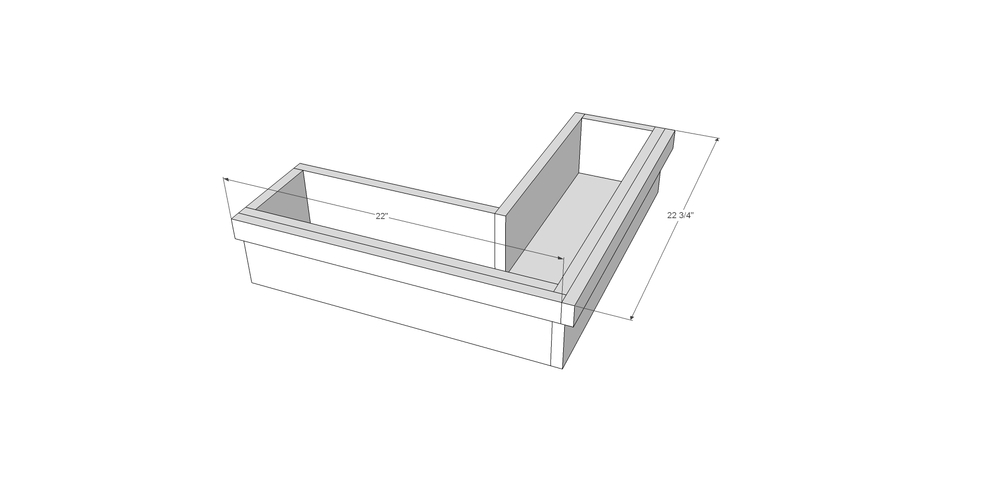
- 22.75" - Middle Front
- 22" - Middle Front
- 28.25" - Middle Bottom
- 22.75" - Middle Bottom
- 22" - Bottom Back
- 21.25" - Bottom Back
- 15.75" - Bottom Front
- 15" - Bottom Front
- 21.25" - Bottom Bottom
- 15.75" - Bottom Bottom
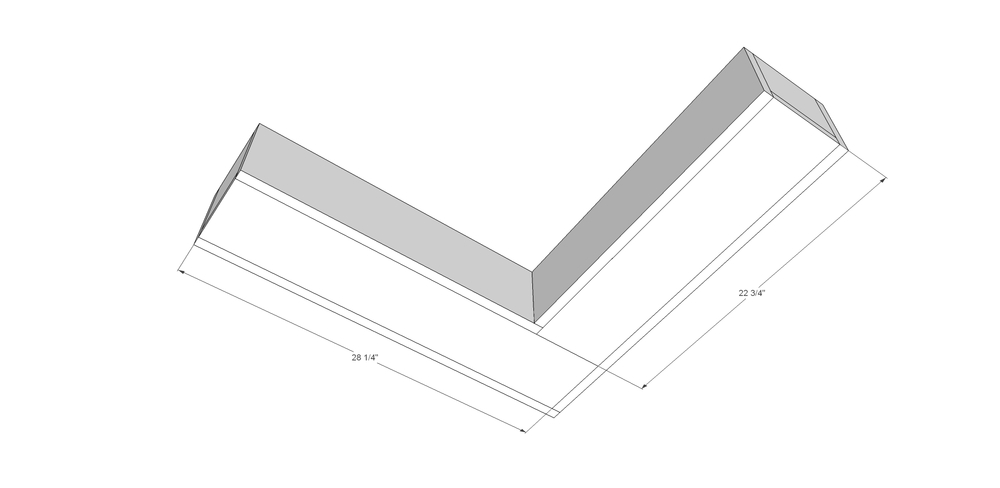
- 6 - 4.75" - Ends
- 1"x2"
- 29.75" - Middle Support
- 29" - Middle Support
- 22.75" - Bottom Support
- 22" - Bottom Support
- 4"x4"
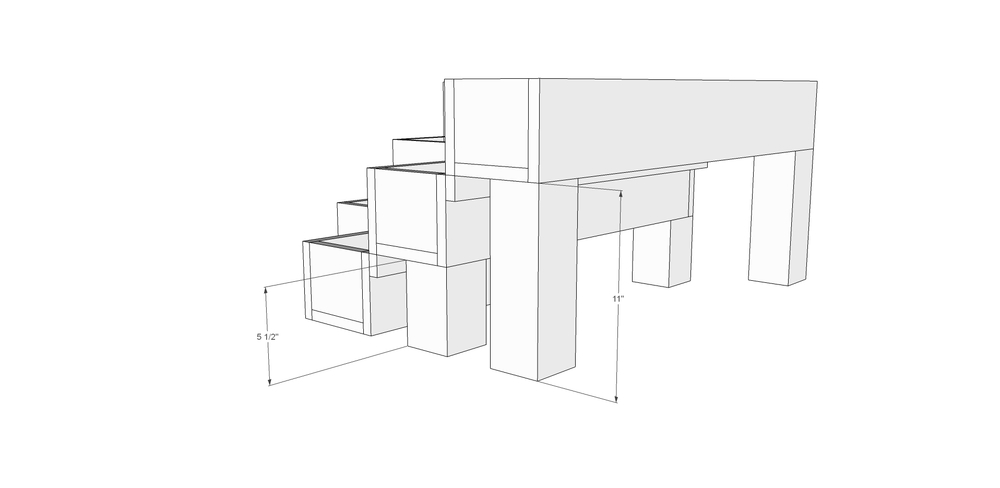
- 3 - 5.5" - Middle Legs
- 3 - 11" - Top Legs
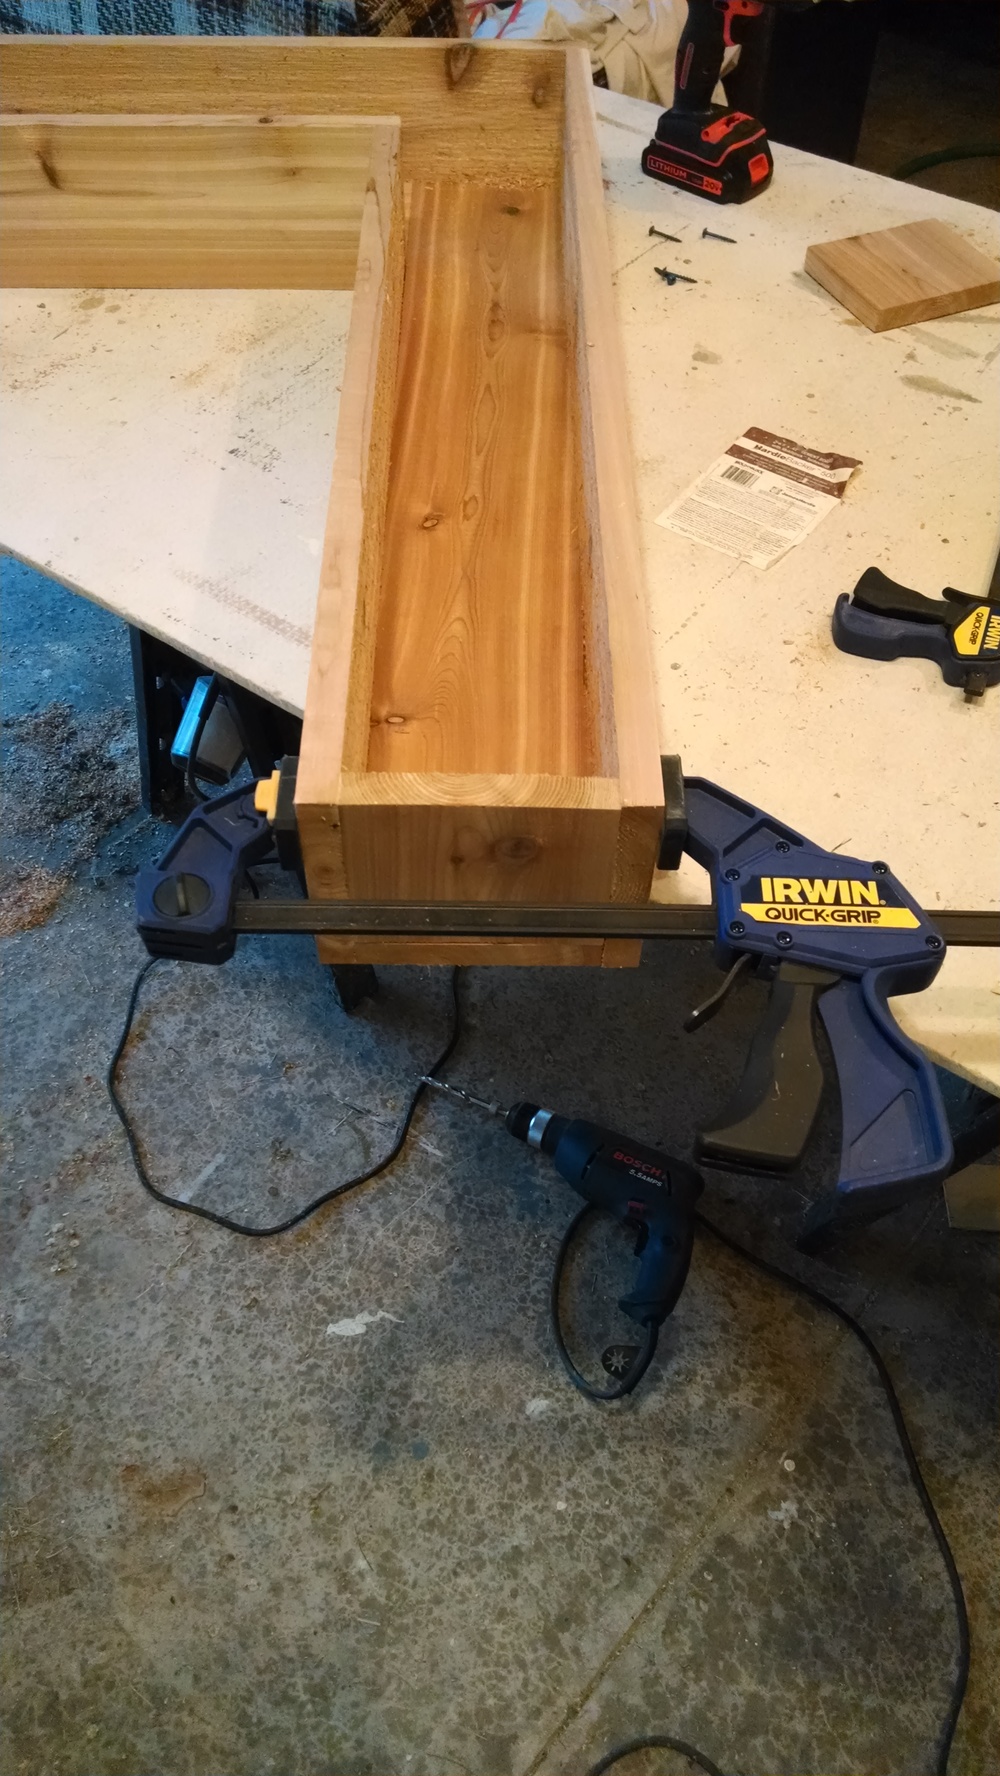
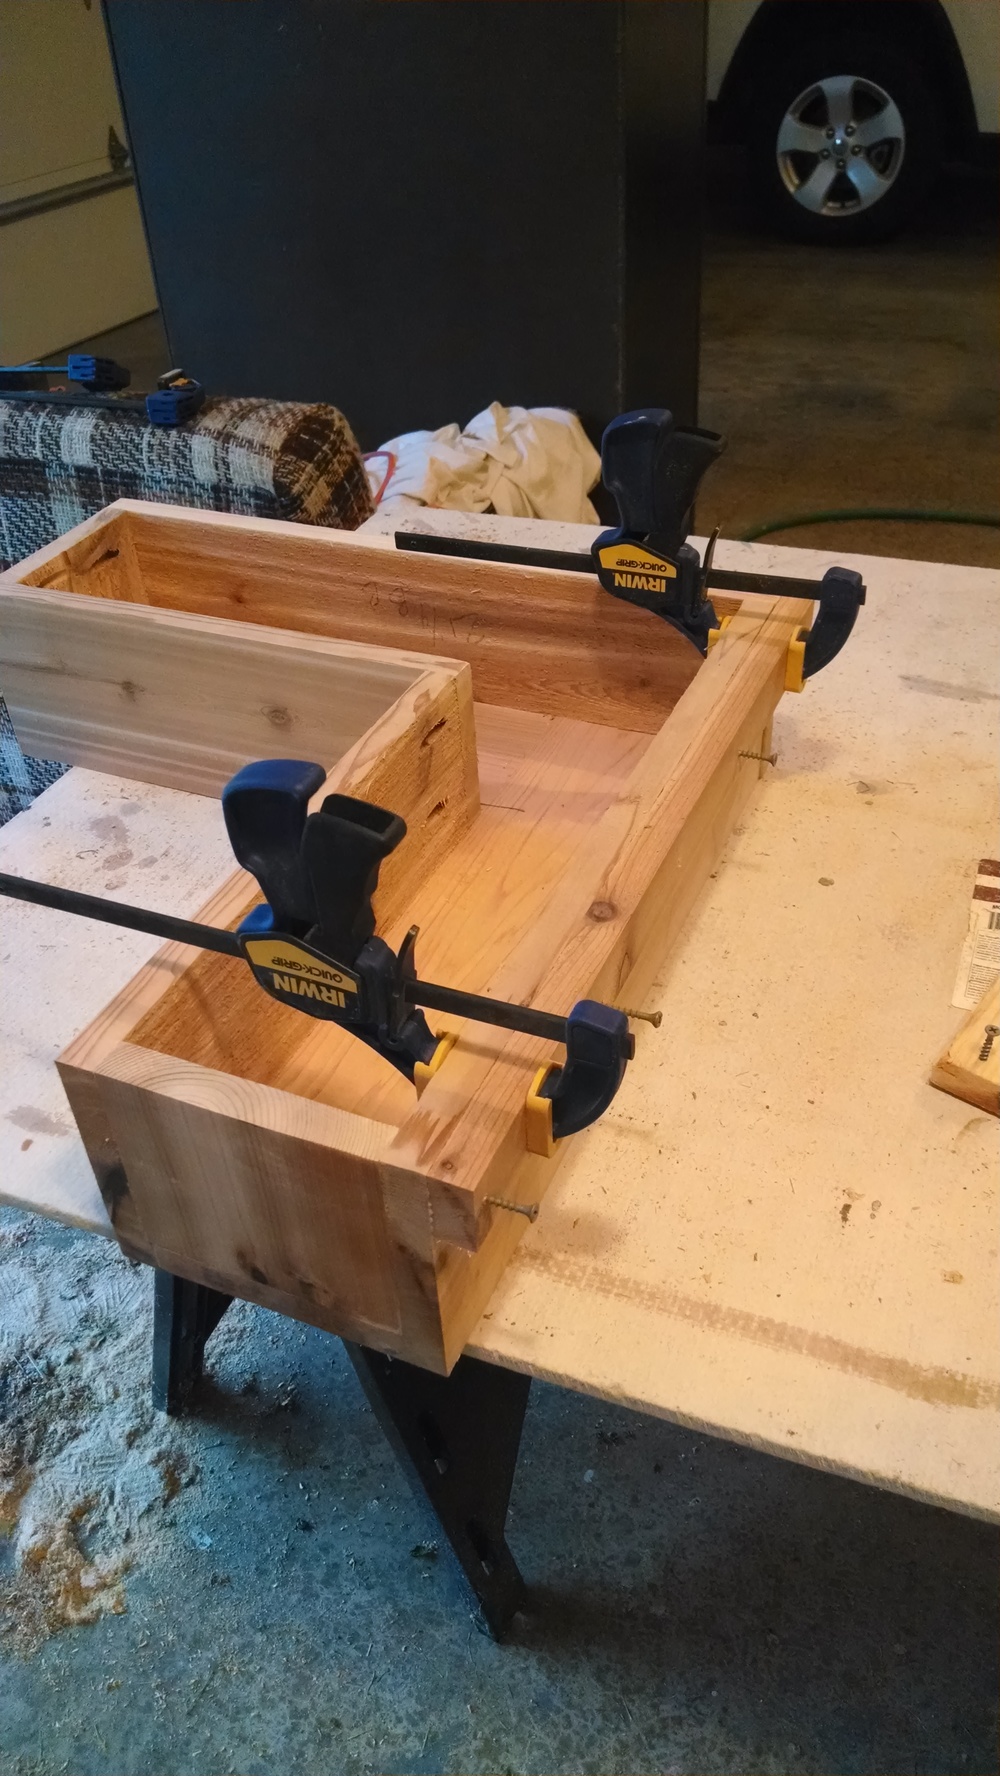
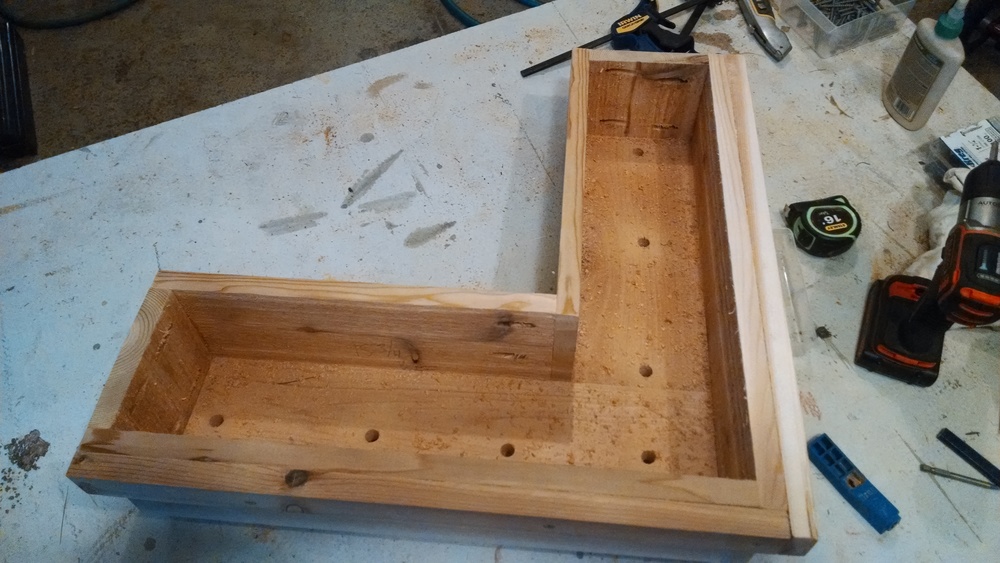
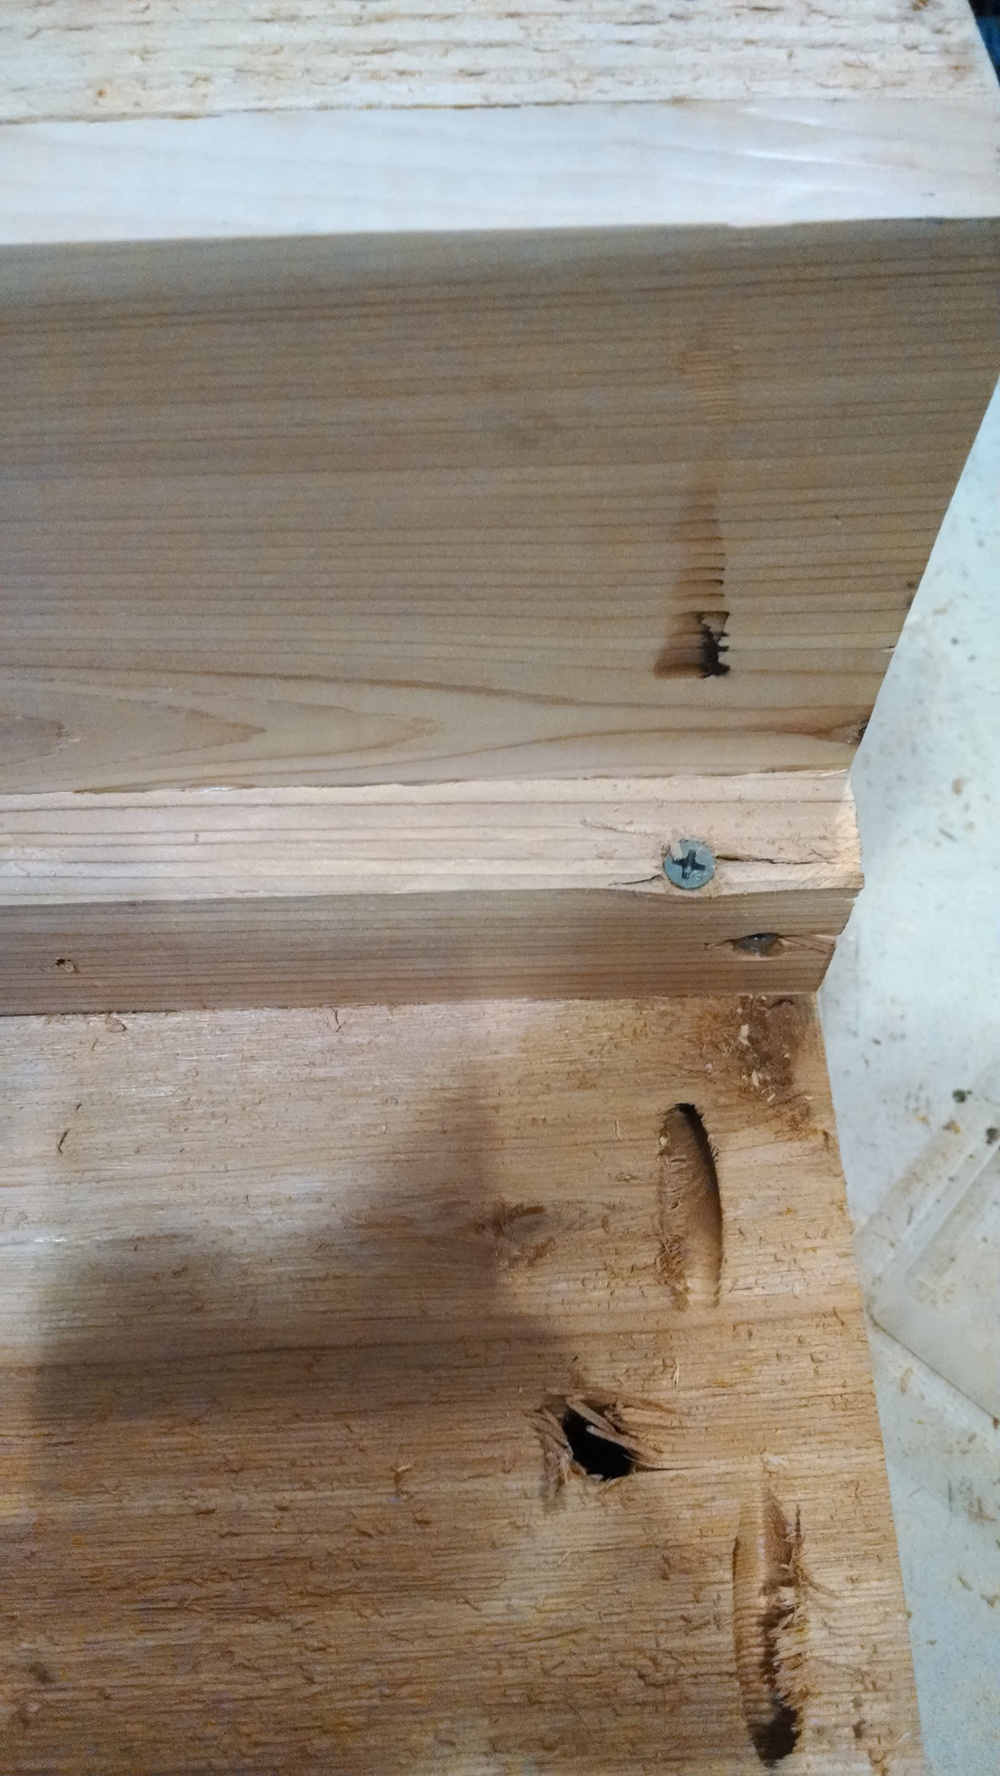
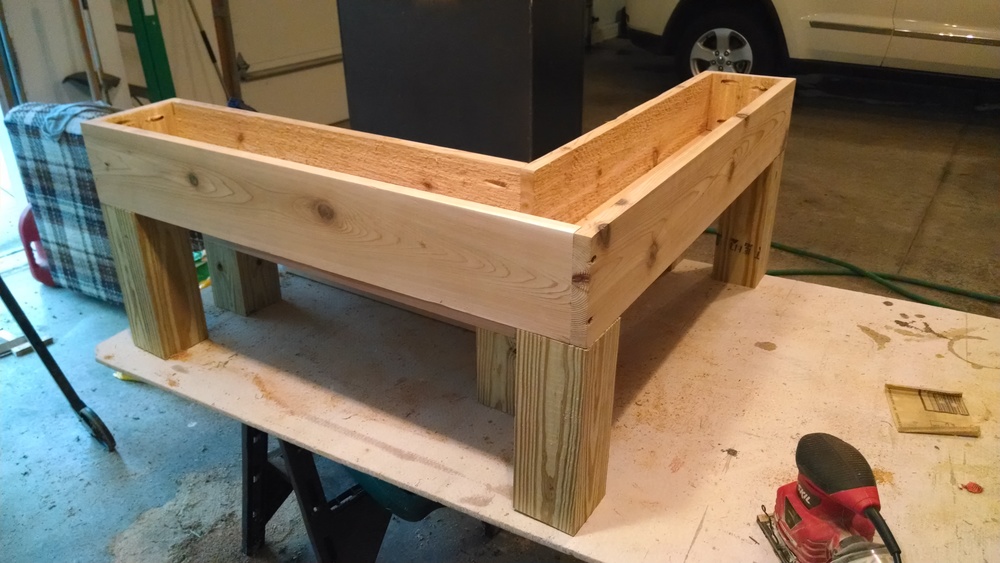
Start building each section of the garden separately by putting pocket holes on the bottom sides of each level. Lay out all the pieces to make sure all the sizes are correctly attached. Attach the bottom to each side using the 1 1/4" pocket hole screws and wood glue. We found it easier to make the left side and right side of each tier separately, then connect the two pieces together with pocket hole screws from the bottom and the inside the front, and then secure the back with 1 1/4" outdoor wood screws and wood glue.
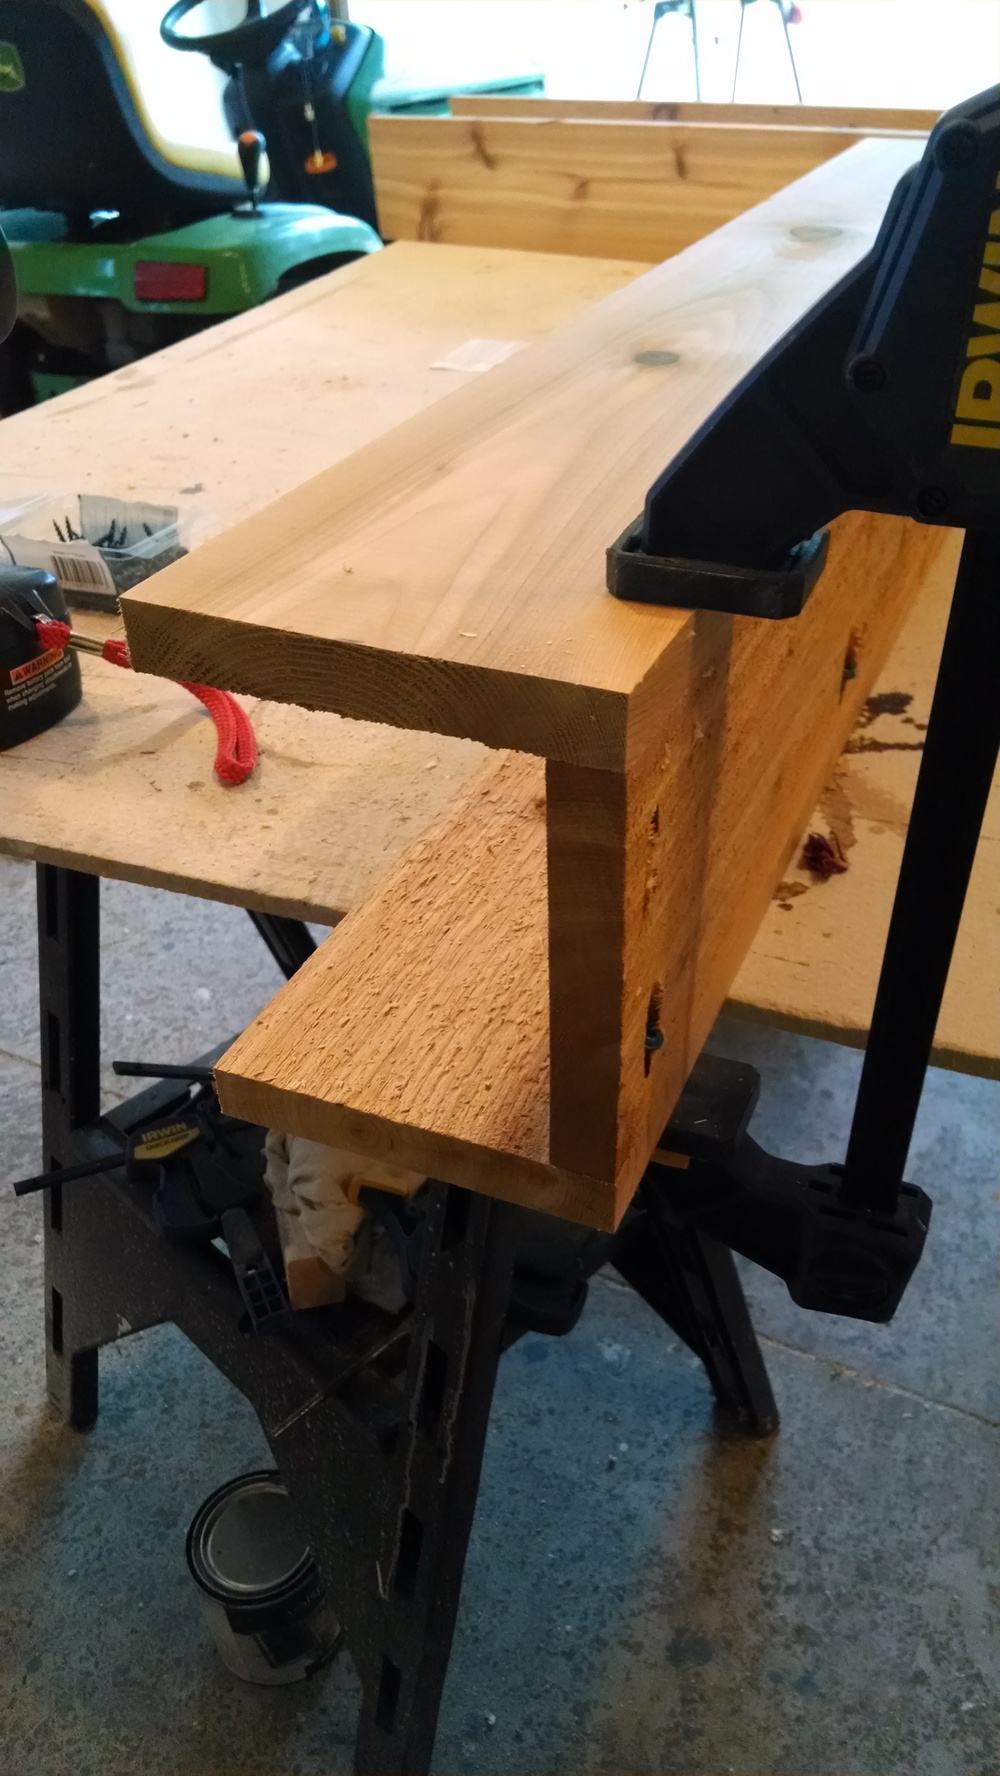
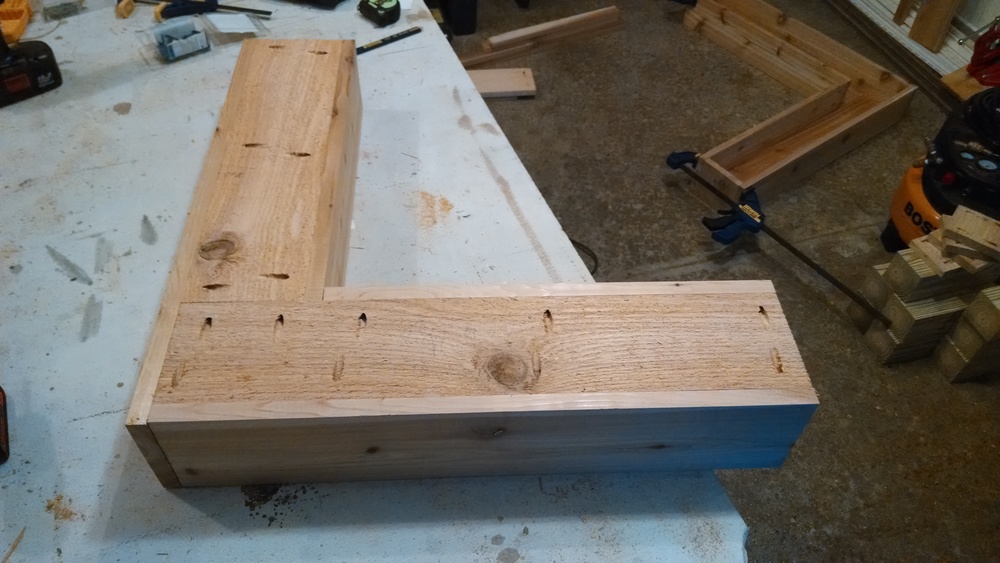
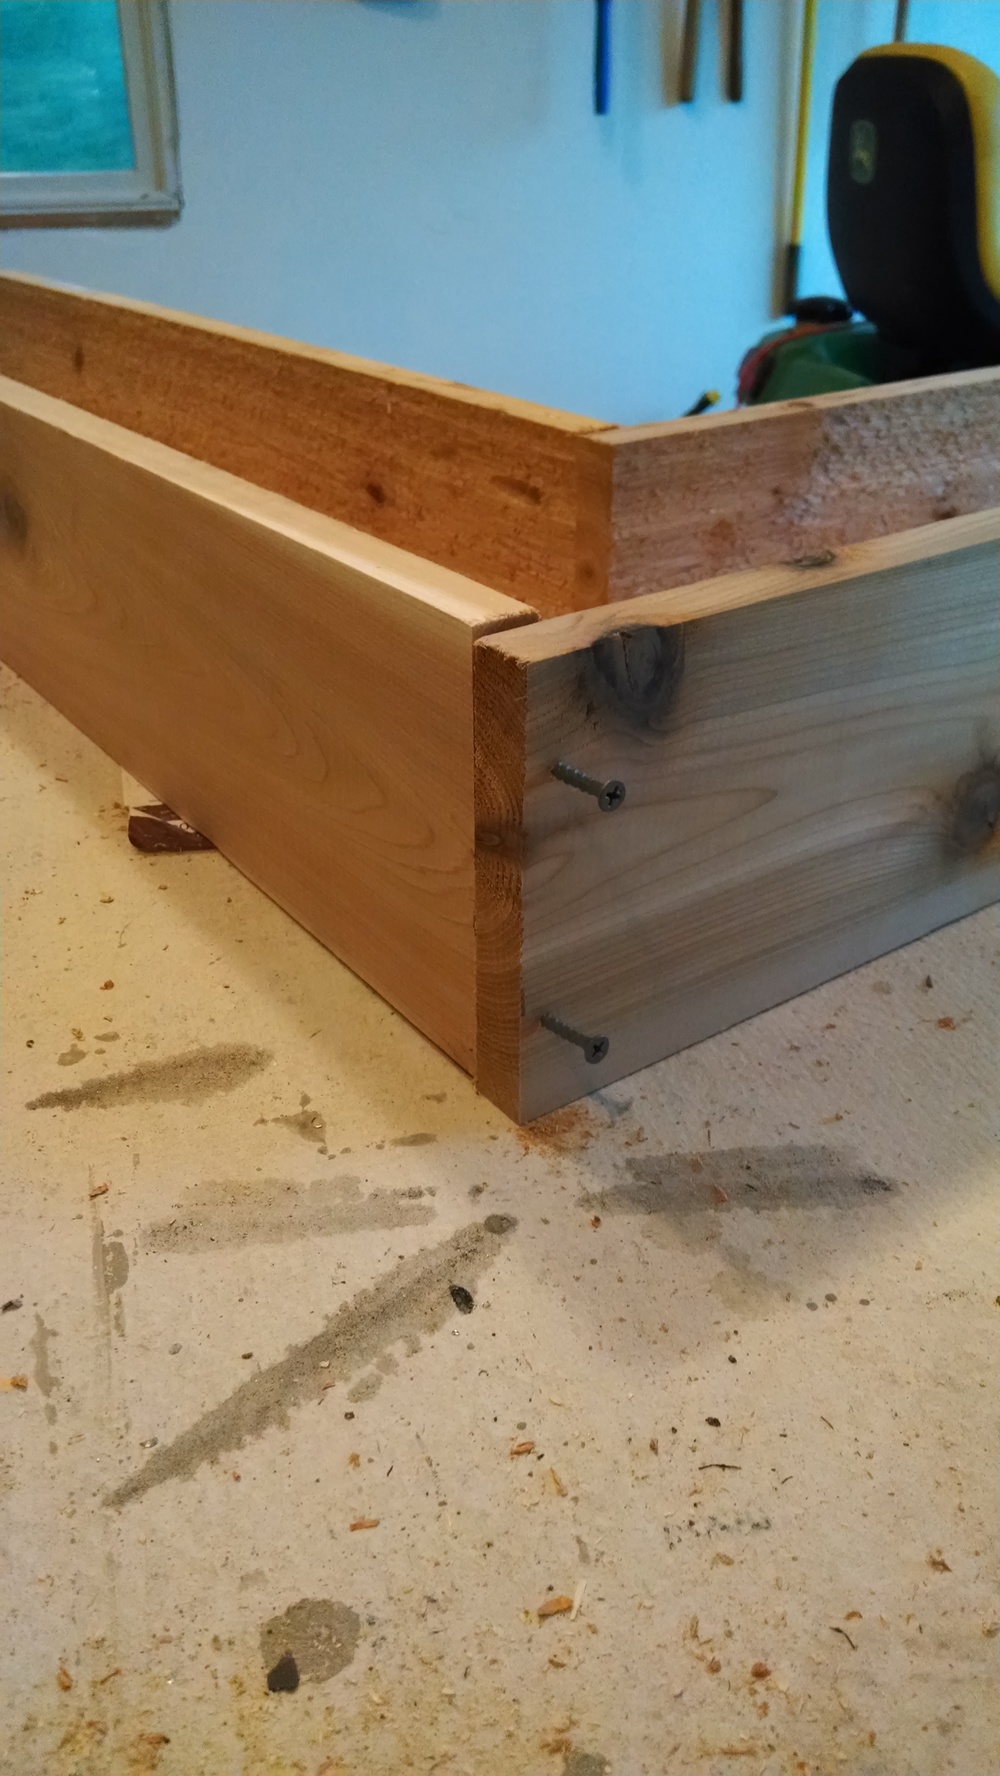
Put wood glue on all edges of the ends, the slide into each end, clamp to hold and put a couple of brad nails in from the outside to help hold.
Attach the supports to the bottom and middle tiers, this is what the next tier will sit on. Use wood glue and 1 1/4" outdoor wood screws.

Turn the top tier upside down, then put the middle tier upside down on top of it, matching up the support on the middle tier with the back edge of the top tier. Attach with wood glue and 2" outdoor wood screws.
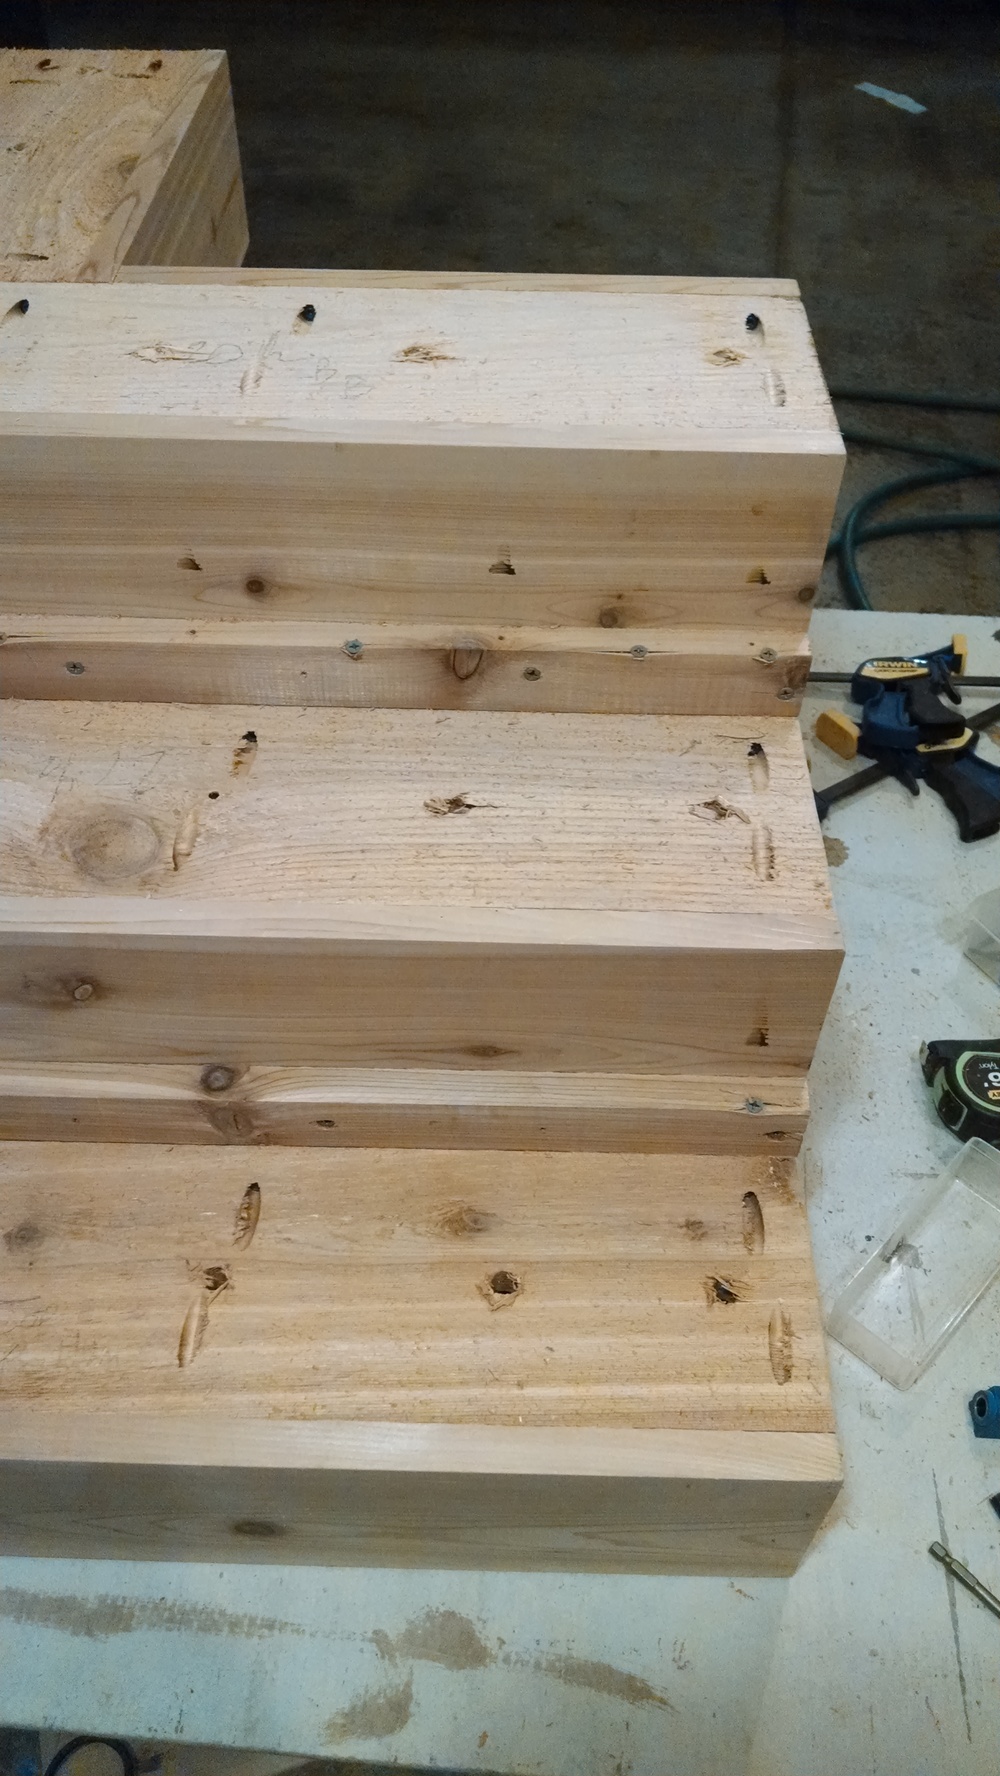
Repeat process to attach bottom tier to middle tier.
Flip everything back over, surprisingly mine stood up without any supports on the back at this point in time, which made it easy to attach the legs on each end and back of the middle and top levels with wood glue and 2" screws driven down through the inside of each level.
Seal the screw holes for the legs with caulk to prevent water from getting into the middle of the legs.
Stain/finish as desired. We used Olympic Premium Stain and Sealant in Oxford Brown. Line the bottom of the planter with landscape fabric to prevent the dirt from leaking out the drain holes. Plant herbs/flowers and enjoy.
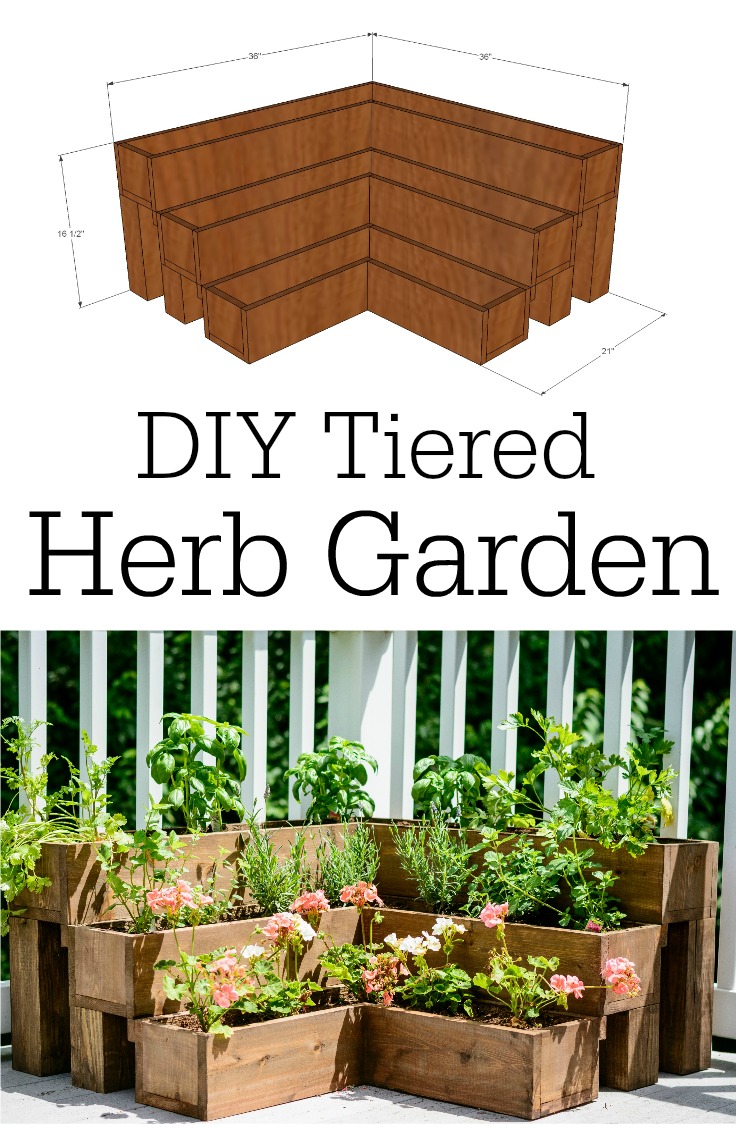
Who's ready to tackle an herb garden? I actually don't think it's too late. Our herbs are thriving!
Check out our other outdoor planters!
Original article and pictures take http://decorandthedog.net/decorandthedog/2014/7/22/diy-tiered-herb-garden-tutorial site
Комментариев нет:
Отправить комментарий