
1. Think about your face shape.
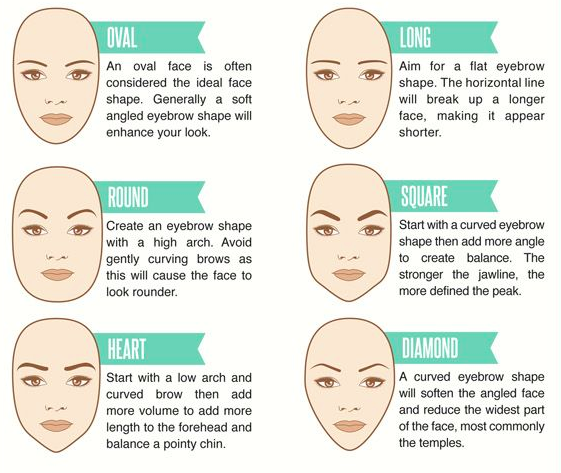
Various eyebrow shapes can complement your features in different ways. Curved brows can soften an angular face, while flat brows can add more drama to a longer face.
2. Figure out the brow shape you want.
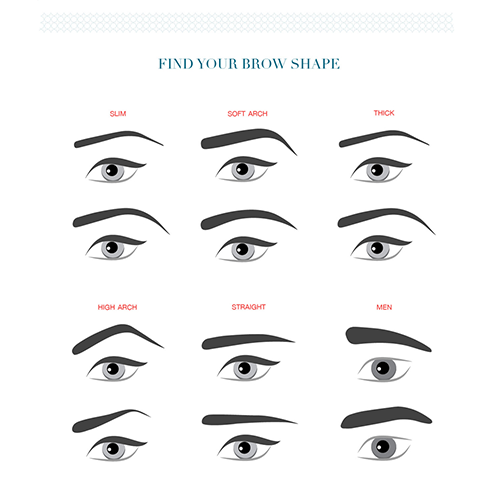
Thin or thick? Arched or straight?
3. Here they are on a person IRL:
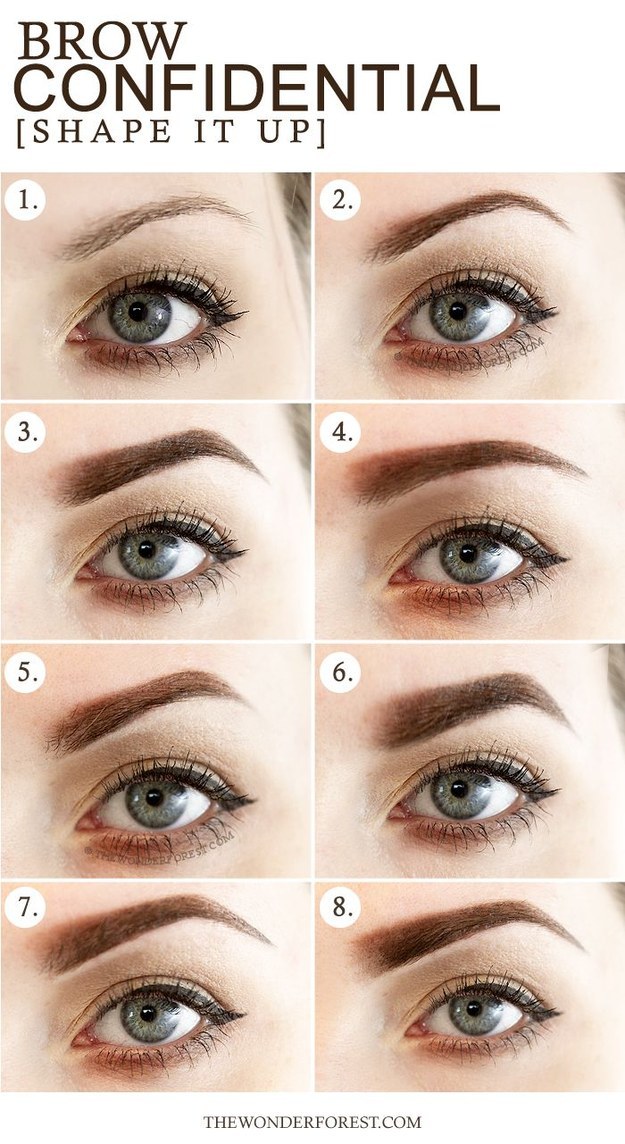
Thicker brows can add more impact to a face, while slightly thinner brows can give a delicate look.
4. Learn brow terminology.

The head is the part of your brow that’s closest to your nose. The tail is the end that’s farthest away.
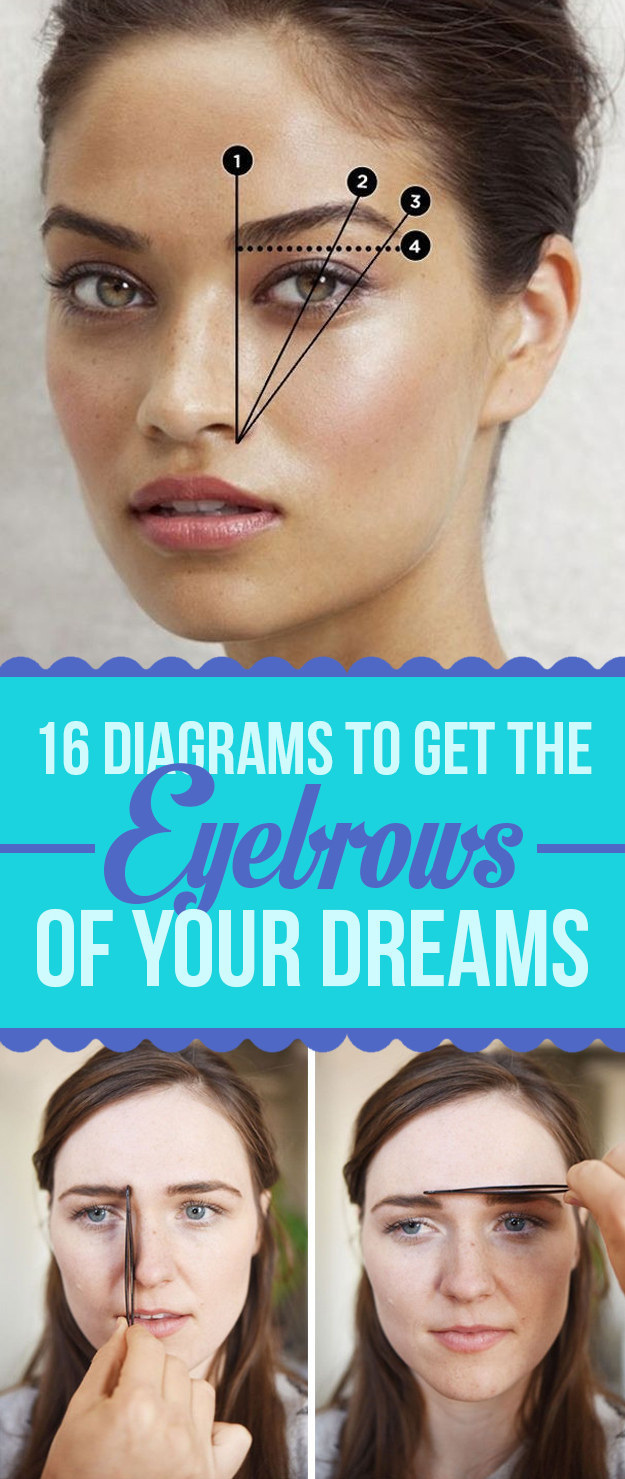
5. Map out where your eyebrows should begin and end.
Hold the tweezer vertically from the outermost part of your nostril straight up to your eyebrow. The place where the tweezer hits is where the innermost part of your eyebrow should begin. Then, hold the tweezer diagonally from the outermost part of your nostril to the outermost part of your eye. Where the tweezer extends past your eye is where the tail (or outermost part) of your eyebrow should end. Learn more about it here.
6. The measurements should look something like this:
Try this technique to simplify the shaping process.
7. Know your shaping tools.
Get the tricks of the trade.
8. And your fill-in tools.
If you want to get all of your tools at once, try a comprehensive kit like Alima Pure Brows That Wow kit.
9. Groom stray hairs around thick brows to add definition.
Tweeze above and below your natural brow by plucking out hairs. If you need to, use an eyebrow razor from the side of your hairline to just above the top of your eyebrow to remove any thin, excess hair on your temples. Learn more about it here.
10. Choose a fill-in color that is one shade lighter than your natural brow color for a softer look.
A deep black color can look severe even on black brows.
11. Or choose a darker brow shade for a more striking look.
Brows for dayyyyssss.
12. Fill in thin brows with a pencil or use brow powder and a brush.
Use light, short strokes to mimic your natural eyebrow hairs. Make sure to start light. You can always add more if you need, but it’s harder to remove brow product once it’s already on the hairs.
13. Try using a brow stencil.
It’s like training wheels for brow grooming.
14. Wet your brow brush for a bolder look when using powder.
Wet the brow brush before dipping it into the brow shadow for stronger-looking brows.
15. Get a refined but natural look with brow gel.
Add more shape to your brows without having to fill them in. This is also a great trick for upgrading brows while you’re on a warm-weather vacation.
16. Use concealer to clean up the edges.
Apply concealer under the eyebrow line for a precise and polished look.
Original article and pictures take http://www.buzzfeed.com/alisoncaporimo/killer-brows?utm_term=.iid5zq7E0&sub=3752558_5513981 site
Комментариев нет:
Отправить комментарий